
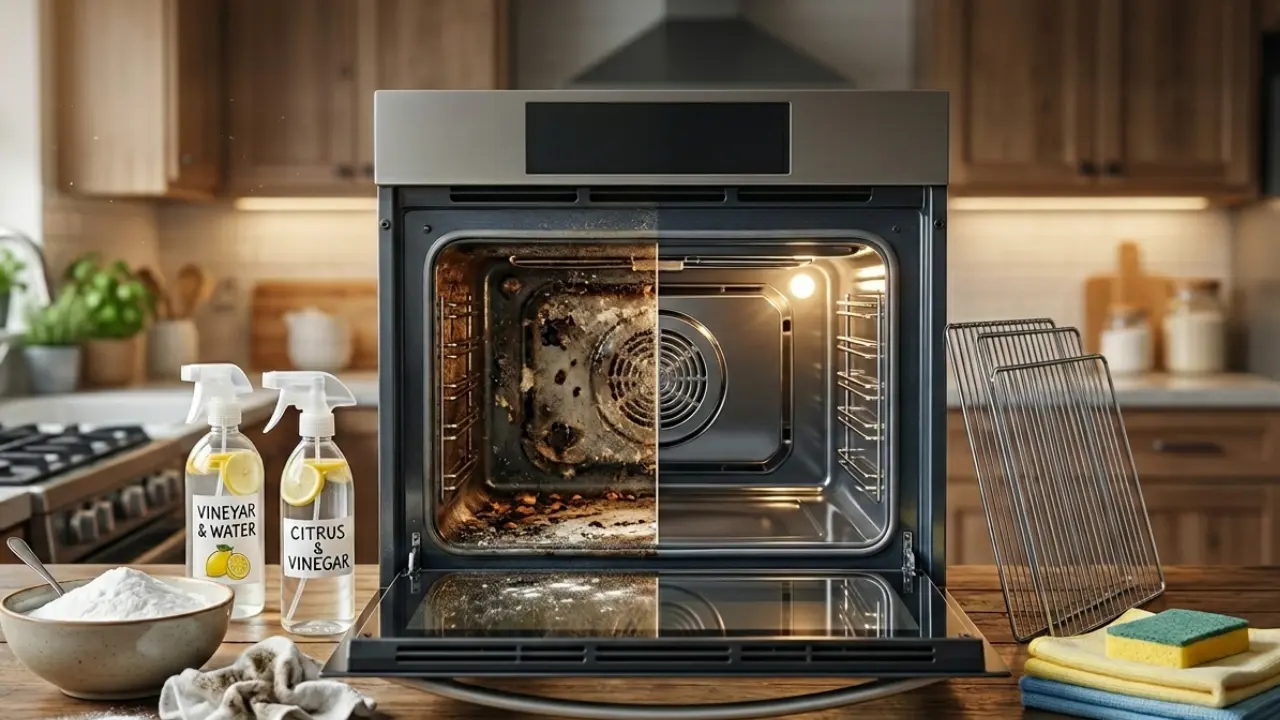

You know the smell immediately. The oven starts preheating and within minutes the kitchen fills with burning smoke, old grease, and that sharp smell of melted cheese turning black on the oven floor. If you have ever searched for how to clean an oven because every preheat feels like a warning sign, the real problem is usually baked-on oil, food splatter and carbonized crumbs that have been reheated too many times.
The frustrating part is that many commercial oven cleaners create another problem. Their chemical sprays can irritate your eyes, throat and nose, especially when you are leaning into a tight oven space and breathing in the fumes. That is why learning how to clean an oven naturally is not only about appearance. It is also about making the process safer, calmer and less harsh inside your home.
How to Clean an Oven Naturally Without Chemical Cleaner
Coat the cool oven with baking soda paste. Let it sit overnight, then spray vinegar to loosen grime. Wipe with warm water until residue disappears and glass clears.
This method is not based on aggressive scrubbing. It works because baking soda, water, vinegar and time soften the hardened layer before you try to remove it. The cleaner does not need to overpower the oven grime in a few minutes. It needs to sit long enough to break the grip.
Also Read: 7 Small Room Changes That Reduce Visual Stress
Science Behind Using Baking Soda
Most oven dirt is not ordinary dirt. When oil splashes onto hot oven walls and gets reheated again and again, it can go through a process called polymerization. This means soft cooking oil slowly changes into a tougher, sticky, plastic-like carbon layer that clings to enamel, glass, racks and corners.
That is why wiping with a wet cloth often does almost nothing. You are not just removing fresh grease. You are trying to loosen a hardened shield of burnt oil, sugar, cheese, crumbs and smoke residue that heat has bonded to the surface over time.
Baking soda helps because it is mildly alkaline. Much of the greasy residue inside an oven is acidic or fatty and alkaline cleaners can help weaken those greasy bonds. This is connected to a process called saponification, where fats begin to break down into a more soap-like, removable residue.
Vinegar works in a different way. Vinegar is acidic and when it touches leftover baking soda, it creates a fizzing reaction. Those micro-bubbles help lift the loosened paste and crust from the surface so the final wiping stage becomes easier.
The order matters. Baking soda should sit first so it can soften the build-up. Vinegar should come later, after the waiting period, to help foam up the remaining residue and make it easier to wipe away.
The Natural Oven Cleaner Toolkit
Before you begin, prepare everything in one place. Oven cleaning becomes much easier when you are not searching for towels or a spray bottle after your gloves are already covered in paste.
| Item Required | Exact Amount | Specific Role |
|---|---|---|
| Baking soda | 1/2 cup | Softens baked-on grease and helps loosen carbonized food residue |
| White distilled vinegar | 1/2 cup in a spray bottle | Creates fizzing action and helps lift leftover baking soda paste |
| Water | 2–4 tablespoons for paste, plus extra for rinsing | Turns baking soda into a spreadable paste and removes residue at the end |
| Plastic scraper | 1 small scraper | Lifts softened crust without scratching enamel or glass |
| Microfiber towels | 3–5 towels | Wipes paste, grease and moisture without rough scratching |
You can also use gloves, a bowl, a sponge and a small brush if you have them nearby. They are helpful but the main cleaning power comes from baking soda paste, waiting time, vinegar and repeated wet wiping.
Step-by-Step Instructions: How to Clean Your Oven Overnight
Start only when the oven is completely cool. Do not apply paste, vinegar, water or towels inside a warm oven.
This overnight method works best for ovens with smoke smell, brown grease stains, blackened cheese spots and dried splatter on the walls or door.
Step 1: Remove the Racks and Vacuum Loose Debris
Take out the oven racks, trays, thermometer, pizza stone and anything else inside the oven. You need a clear space so the paste can reach the walls, bottom, corners and door.
Next, remove loose crumbs and dry burnt food. You can use a handheld vacuum, a dry brush or paper towels. This step may feel small but it prevents dry debris from mixing into the paste and spreading everywhere.
Pay attention to the bottom corners and the area near the oven door. Small burnt pieces often hide there and continue to smoke every time the oven heats up.
Also Read: How to Stop Sticky Skin in Humid Weather
Step 2: Mix the Paste to a Thick Shaving Cream Consistency
Add 1/2 cup baking soda to a small bowl. Slowly mix in 2–4 tablespoons of water until the texture looks like thick shaving cream.
The paste should be soft enough to spread, but thick enough to stay on the oven walls without dripping. If it runs, add more baking soda. If it crumbles, add a little more water.
This texture matters because a thin liquid will slide down before it has time to work. A thick paste stays attached to the grease and keeps softening it for hours.
Step 3: Paint the Walls From Ceiling to Floor
Using gloved fingers, a sponge or a soft brush, spread the baking soda paste over the dirty areas of the oven. Start with the ceiling, then cover the back wall, side walls, bottom surface and inside door.
Do not coat heating elements, gas vents, fans, electrical openings, light sockets or rubber gaskets. The paste is meant for enamel and glass surfaces, not sensitive functional parts of the appliance.
Add a slightly thicker layer over dark brown or black patches. These are usually the most hardened areas, so they need more contact time.
How to Use Baking Soda and Vinegar for Oven Cleaning
The best way to use baking soda and vinegar for oven cleaning is to separate their roles. Baking soda does the long soaking work. Vinegar helps during the final lifting and rinsing stage.
Do not mix baking soda and vinegar in a bowl before applying them. The fizz may look powerful but the reaction happens too early and loses much of its usefulness before it touches the oven grime.
Apply baking soda paste first, let it sit, then spray vinegar after the waiting period. That gives you the benefit of both ingredients without wasting the reaction.
Step 4: Leave It Alone for 12 Hours
Close the oven door and leave the baking soda paste alone for at least 12 hours. Overnight is the most practical option because the paste has enough time to soften baked-on grease without constant scrubbing.
During this time, the white paste may turn yellow, brown or gray. That is normal. It means grease and residue are being pulled into the paste.
For a lightly dirty oven, 4–6 hours may be enough. For an oven that smokes during preheating or has years of build-up, the full overnight wait gives a much better result.
Step 5: Spray Vinegar, Foam and Rinse With a Wet Cloth
After the waiting period, wipe away as much dried paste as possible with a damp microfiber cloth. Rinse the cloth often so you are not spreading dirty paste around the oven.
Next, spray white distilled vinegar onto the remaining baking soda residue. You should see gentle foaming where the vinegar touches the paste. Let it sit for a few minutes.
Use a plastic scraper to lift softened crust from stubborn areas. Do not dig into the surface. If something does not come off easily, apply a little more baking soda paste and give it more time.
Finish with several rounds of clean wet wiping. This final rinse is important because leftover baking soda can dry into a white film. Keep wiping until the oven surface feels smooth instead of gritty.
Leave the oven door open so the inside can dry fully before cooking again.
How to Clean Oven Racks in the Bathtub Easily
Oven racks are often harder to clean than the oven walls because grease sticks around every wire. A sink is usually too small, so the bathtub method gives the racks enough room to soak evenly.
First, line the bathtub with old towels. This protects the tub from scratches when the metal racks shift during soaking.
Place the racks on top of the towels, then fill the tub with enough hot water to cover them. Add dish soap generously and let the racks soak for several hours. For heavy grease, leave them overnight.
After soaking, scrub the racks with a non-scratch sponge or soft brush. The softened grease should come off more easily than it would with dry scrubbing.
Rinse the racks well and dry them completely before returning them to the oven. Do not put wet racks back inside, because dripping water can collect in corners and around lower surfaces.
Also Read: How to Stop Clothes From Smelling Bad in Summer
How to Get Baked-On Grease Off Oven Glass Safely
Oven glass needs a gentler approach than the oven walls. Most oven doors use tempered glass, which is built to handle heat but it can still develop micro-scratches from sharp or abrasive tools.
Spread a thin layer of baking soda paste over the greasy glass. Let it sit for about 30 minutes instead of overnight. Glass usually does not need the same long contact time as thick grease on oven walls.
After 30 minutes, wipe the paste with a damp microfiber cloth using small circular motions. If grease remains, repeat the paste treatment instead of scraping harder.
Avoid razor blades, steel wool, metal scrapers and rough scouring pads. These may remove grease quickly but they can also leave fine scratches that become visible when light hits the oven door.
For a clearer finish, wipe the glass with a fresh damp cloth, then dry it with a clean microfiber towel.
3 Common Oven Cleaning Mistakes
Natural cleaning is safer than harsh spraying, but oven cleaning can still go wrong if you use the wrong shortcut. These mistakes are common because they seem convenient at first.
1. Relying Too Often on the Self-Cleaning Button
The self-cleaning cycle can reach extremely high temperatures, often around 900°F. That heat can burn food residue into ash but it also puts major stress on the appliance.
Frequent self-cleaning can overheat electronic control boards, door locks, wiring and thermal fuses. This is especially risky in older ovens, heavily soiled ovens or appliances with poor ventilation.
The self-cleaning feature is not always useless, but it is not the gentlest option. If your oven is already smoking badly, manual cleaning is often the safer first step.
2. Putting Aluminium Foil on the Oven Floor
Many people place aluminium foil on the oven floor to catch spills. It seems harmless but it can permanently damage modern ovens.
Foil can trap heat, melt onto enamel, interfere with airflow and ruin the oven lining. Once foil melts into the surface, it can be extremely difficult or impossible to remove cleanly.
Use only oven-safe drip trays or liners that your appliance manual clearly allows. Do not assume foil is safe just because people used it in older ovens.
3. Scrubbing With Metal Tools
A metal scraper may feel effective against burnt grease but it can scratch enamel and glass. Once the surface is scratched, future grease can cling even more stubbornly.
Use a plastic scraper, microfiber cloth, soft sponge or repeated baking soda paste treatment instead. If a spot is not moving, it usually needs more softening time, not more force.
The goal is not to attack the oven. The goal is to weaken the hardened grease until it releases with less pressure.
When You Should Repeat the Cleaning Process
A single overnight clean is enough for many ovens, but very dirty ovens may need two rounds. This is especially true if the oven has years of grease build-up or smokes every time it reaches high temperature.
Do not judge the method too early. If the first round removes most of the grime but leaves a few dark patches, that usually means the paste worked but the deepest layer needs more time.
Apply a second thin layer of baking soda paste only to the stubborn spots. Let it sit again, spray vinegar and wipe carefully.
This is better than forcing everything off in one aggressive scrub. Slow softening protects the oven surface and gives you a cleaner result.
Also Read: Benefits of Light-Coloured Clothes in Summer
How to Keep the Oven Cleaner After This
The easiest oven to clean is the one that never gets deeply baked-on in the first place. Once you finish the overnight cleaning, small habits can prevent the same heavy build-up from returning.
Wipe fresh spills after the oven cools. Fresh grease is much easier to remove than grease that has been reheated several times.
Use a baking tray under dishes that bubble over, especially casseroles, pizza, pies and cheesy foods. Do not place foil directly on the oven floor.
Check the oven floor after messy cooking. A few crumbs or cheese drips may not look serious but they can turn into smoke during the next preheat.
Clean the glass lightly once a month if you cook often. A short 30-minute baking soda treatment is much easier than fighting a thick brown layer later.
The Clean Result You Are Looking For
A naturally cleaned oven may not always look factory-new after years of use, but it should stop smelling smoky, heat more cleanly and feel safer to cook in. The real success is not only a shinier oven door. It is opening the oven without smelling burnt grease before the food even goes in.
Baking soda and vinegar work best when you let time do the heavy lifting. Spread the paste, wait overnight, foam with vinegar and rinse patiently. That simple process can turn a smoky, greasy oven into a usable appliance again without relying on harsh chemical sprays.

3 thoughts on “5 Steps to Clean an Oven Naturally Overnight”